Backward Design Lesson Plan: A 7-Step ESL Guide
Most ESL lesson plans start with an activity that looks fun, then bolt an objective onto the top. A backward design lesson plan flips that order — you commit to what students must prove they can do, then engineer every task, drill, and discussion to make that evidence appear. The framework comes from Grant Wiggins and Jay McTighe’s Understanding by Design, and once you teach with it for a week, traditional planning starts to feel like driving without a destination.
This guide walks through the three stages, lays out a 7-step ESL workflow, and finishes with a worked example for a B1 speaking lesson. If you’ve ever spent forty minutes designing a worksheet only to realise it doesn’t actually test the target language — this is the fix.
What Is a Backward Design Lesson Plan?
A backward design lesson plan is a planning sequence that begins with the end. You define what students should know and do by the end of the lesson, write the assessment that proves they did it, then design the activities that build toward that assessment. Wiggins and McTighe introduced the approach in 1998, and it now anchors curriculum design at universities from Vanderbilt to Kent State.
The shift sounds small. It isn’t. Traditional planning starts with content (a unit on past simple), moves to activities (gap-fills, a video, pair work), and saves assessment for the end — often a generic quiz that barely matches what was taught. Backward design refuses that order. You ask first: What would a successful student be able to do, in a real situation, by the end of this lesson? Everything else flows from the answer.
The Three Stages of Backward Design
Backward design has exactly three stages. Skip one, and the framework collapses back into ordinary planning.
Stage 1 — Identify Desired Results. Decide what students should know, understand, and be able to do. For ESL, this means a performance outcome, not a content list. “Students will know the past simple” is not a result. “Students will narrate a weekend trip using six past simple verbs and two time markers” is.
Stage 2 — Determine Acceptable Evidence. Before you design any activity, decide how a student will prove the outcome. This is the assessment, and it has to match the result exactly. A multiple-choice quiz cannot prove a narration skill. A two-minute recorded monologue can.
Stage 3 — Plan Learning Experiences. Now — and only now — you build the activities. Each one has to either teach the target language, build the sub-skill, or rehearse the assessment task. If an activity doesn’t do one of those three jobs, cut it.
Why Backward Design Works for ESL Classrooms
Here’s the truth most teacher-training programs won’t say out loud: ESL classrooms drift toward activity-collecting. You find a great speaking game, you slot it in, then you write an objective afterwards that sort of matches. Backward design ends that habit because the objective is no longer a label — it’s the foundation.
The payoff shows up in three places. Assessments suddenly become honest, because they were designed before any teaching contaminated them. Pacing improves, because every activity has a job and the ones that don’t get cut. And student feedback gets sharper — when learners ask “why are we doing this?” you have a one-sentence answer instead of a vague “for practice.”
I’ve trained teachers who resisted backward design for a full semester before trying it. The same teachers, by week two of attempting it properly, stopped going back. The reason wasn’t ideology. It was that they finished lesson planning faster, with less guilt about whether the lesson “covered enough.”

The 7-Step Backward Design Lesson Plan Process
The three stages give you the architecture. These seven steps give you something you can actually open a Google Doc and follow.
Step 1 — Write the “By the end of this lesson” sentence
One sentence. Performance verb plus context plus measurable scope. Bad: “Students will understand modals.” Good: “Students will give three pieces of unsolicited advice using should, shouldn’t, и had better during a role-play.”
Step 2 — Decide the evidence task
What will students do that proves the sentence in Step 1? For productive skills, this is almost always a short performance: a monologue, a written response, a role-play, a short presentation. Receptive skills can use a comprehension task, but never one with fewer than five items — otherwise luck masks competence.
Step 3 — Write the success criteria
What does “good enough” look like? Three to five concrete descriptors, written in student-friendly language. Example: Uses all three target modals; pronounces them with weak forms where appropriate; gives advice that fits the situation. These descriptors are also what you’ll use to give feedback at the end of the lesson.
Step 4 — Identify the language students need
Now — and not before — you list the target language. Grammar, vocabulary, functional phrases, pronunciation features. Anything that doesn’t directly feed the evidence task gets stripped out. Eight new lexical items beats sixteen every time.
Step 5 — Sequence the learning activities
Activities should escalate from controlled to free. A classic shape: noticing task → controlled practice → semi-controlled practice → freer rehearsal → the evidence task itself. Each stage gets between five and twelve minutes for a sixty-minute lesson.
Step 6 — Build the materials
Worksheet, slide, audio, prompt cards — whatever the activities require. Do this last because earlier steps often reveal that you don’t need the worksheet you assumed you would. A pen-and-mini-whiteboard noticing task can replace three pages of printable.
Step 7 — Sanity-check against the original sentence
Read your “by the end of this lesson” sentence again. Look at the assessment. Look at the activities. If a colleague glanced at your plan, would they be able to tell what students were meant to walk away able to do? If not, rewrite Step 1 with sharper verbs and try again.

Backward Design vs. Traditional ESL Lesson Planning
The simplest way to feel the difference is to plan the same lesson twice, both ways. Try it on a unit you’ve taught before — say, present perfect for life experiences.
The traditional path: open the coursebook, see the present perfect page, sequence the exercises top to bottom, end with the “Now interview a partner” task. The lesson covers a lot. Whether students can actually use present perfect afterwards is anyone’s guess, because the final task wasn’t designed to be diagnostic.
The backward design path: define the result (“Students will ask and answer five ‘Have you ever…?’ questions about travel and respond with one follow-up question each”). Build the evidence (a structured pair interview with note-taking). Identify the language (have/has + past participle, twelve travel-related past participles, three follow-up question patterns). Sequence backwards from the interview: a model dialogue, a controlled fill-in, a mingle with prompt cards, then the interview itself.
The coursebook page becomes a resource, not a script. You use the bits that build toward the interview and skip the bits that don’t. Lesson runs cleaner, students leave with something concrete, and your assessment is no longer guesswork.
A Worked Example — Backward Design for an ESL Speaking Lesson
Here’s a full B1 speaking lesson built from scratch using the seven steps. Sixty minutes, adult learners, intermediate level.
Step 1 — End-of-lesson sentence: Students will give a two-minute spoken recommendation for a place to visit in their city, using comparative language, two adjectives of evaluation, and at least one rhetorical question.
Step 2 — Evidence task: Students record themselves on their phones giving a two-minute “video postcard” recommending a neighborhood, restaurant, or attraction. Recordings are submitted for teacher feedback and one peer review.
Step 3 — Success criteria: Includes at least three comparative structures (better than, more X than, the most…); pronounces the schwa in than as /ðən/; uses one rhetorical question to engage the listener; sustains two minutes without long pauses.
Step 4 — Target language: Comparative adjectives in context (better, livelier, more affordable, quieter); evaluation adjectives (underrated, walkable, atmospheric, buzzing); rhetorical question patterns (“Where else can you…?” “What’s not to love about…?”).
Step 5 — Activity sequence: (1) Watch a 90-second sample video recommendation; students notice the comparative phrases. (2) Controlled gap-fill on comparative forms. (3) Pair task — students compare two pictured neighborhoods using prompts. (4) Mingle — students gather “votes” on which place sounds best from three classmates. (5) Two-minute solo rehearsal. (6) Record the evidence task.
Step 6 — Materials: One sample video, one gap-fill handout, six neighborhood prompt cards, a one-page rubric for peer review.
Step 7 — Sanity check: Every activity feeds the recording. Nothing is decorative. Done.

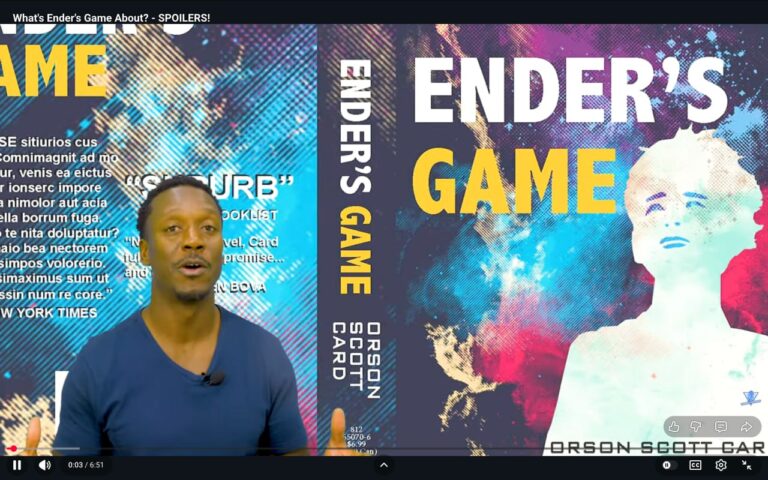
For a strong overview of the framework in plain English, this short explainer from teacher educator Kathleen Jasper covers the core ideas in under ten minutes:
Common Mistakes ESL Teachers Make with Backward Design
Three mistakes show up over and over in teacher training observations, and they all undo the framework.
The first is writing a fake objective. “Students will be able to use the present continuous” is content, not performance. Without a verb that you can actually see (narrate, recommend, describe, instruct, justify, persuade), there’s no evidence task to design.
The second is designing the activities first and writing the assessment after. This is the gravitational pull of traditional planning, and it sneaks back even after teachers know better. The discipline of backward design is that Stage 2 happens before Stage 3, with no exceptions.
The third is over-engineering the evidence task. A two-minute monologue, a four-line dialogue, or a single written paragraph is usually enough. Teachers who insist on assessing five sub-skills inside one task end up with rubrics so long that no one — student or teacher — can use them.

Tools and Templates for Backward Design
You don’t need software. A two-column Google Doc works: left column for the three stages, right column for the seven steps. Some teachers prefer a single A4 sheet with three boxes labelled Result, Доказательство, Activities. The template is whatever forces you to fill in Stage 1 before Stage 3.
One useful upgrade: keep a running list of “evidence task formats” for ESL — short monologue, role-play, dictogloss, written response, jigsaw retelling, picture description, mini-presentation. When Stage 2 stalls, you can pick from the list rather than reinventing the wheel.
If you want a downloadable example, the Backwards Design Lesson Planning Template from Model Teaching is the cleanest free version online. It’s K-12 focused, but the structure transfers straight into ESL.
How Backward Design Fits with Other ESL Methodologies
Backward design is a planning framework, not a teaching method. That distinction matters. You can plan a Task-Based lesson using backward design. You can plan a PPP lesson using backward design. You can plan a CLIL lesson using backward design. The framework tells you how to sequence your planning, not which classroom method to choose.
This makes it especially friendly to task-based language teaching, which already starts from a target task and works backwards toward enabling language. Communicative approaches in general benefit, because they already prize meaningful output — and backward design enforces output as the destination, not the bonus.
If your school mandates a particular methodology, treat backward design as the layer above. The methodology shapes the classroom; backward design shapes the document you put on your desk before class.
Часто задаваемые вопросы
Is backward design a pedagogical approach? Not exactly. It’s a planning framework — a way of organising the teacher’s design work before instruction begins. The pedagogy (how you actually teach) is a separate choice, and backward design plays nicely with most methodologies.
How long does a backward design lesson plan take to write? The first few are slower than a traditional plan — maybe forty minutes for a sixty-minute lesson. After ten or so, most teachers report planning faster than they did before, because there’s no second-guessing the assessment.
Can it work for one-off lessons or only for full units? Both. Wiggins and McTighe originally pitched it for units, but the three-stage logic scales down to a single hour. The only constraint is that very short, drill-heavy lessons sometimes don’t need the full framework.
What if my coursebook controls the syllabus? Treat the coursebook as a resource bank, not the plan. Use backward design to decide what students should be able to do this hour, then mine the coursebook for activities that build toward it. Skip the rest.

Where to Take This Next
Pick the next lesson on your schedule. Write the “by the end of this lesson” sentence first. Then write the assessment. Then build the activities. Don’t open the coursebook until those three pieces are done.
That single discipline is the entire framework. Everything else — the seven steps, the templates, the rubric language — is scaffolding around that one move. Once it becomes habit, your lessons stop drifting, your assessments stop being afterthoughts, and your students stop asking why they’re doing what they’re doing.
For a wider planning workflow that pairs well with backward design, see the 7-step ESL lesson planning guide and the companion piece on reflective teaching for evaluating how the lesson actually went after the bell.
Источники
- Vanderbilt Center for Teaching — Understanding by Design — Overview of the McTighe and Wiggins framework that underpins backward design.
- ASCD — Understanding by Design, Expanded 2nd Edition — Wiggins and McTighe’s foundational text on the three-stage planning framework.
- University of Illinois Chicago — Backward Design — University-level guide on applying backward design to course and lesson planning.
- Cult of Pedagogy — Backward Design: The Basics — Plain-English walk-through of the three stages for working teachers.
- Model Teaching — Backwards Design Lesson Planning Template (PDF) — Downloadable three-stage planning template.